

PLEASE SELECT THE DESTINATION COUNTRY AND LANGUAGE :
| Self-production |
| 한국 |
| $10.50 |
| $60.00 |
| P00000OD |
  |

| Select item with details above |
| Name | Quantity | Price |
|---|---|---|
| Goldland Rubber Car / Tex tbooks / After School Materials / Science / Goldberg |


|
10.5 ( 60.00) 60.00)
|
Discounted amount of your subtotal will appear when you place your orders.
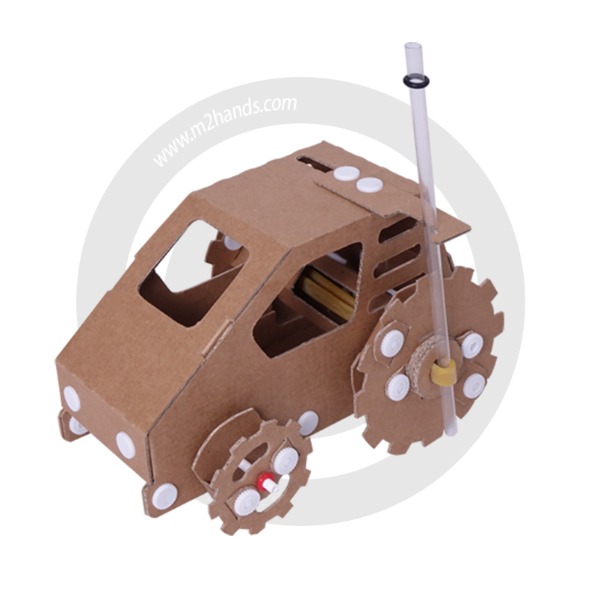
It works with the power of elasticity
"Rubber Car"
Material
corrugated paper, plastic, rubber
Components
body, bottom plate, paper washer, rear wheel axle, rear wheel fixing plate, rear wheel, front wheel fixing plate,
front wheel, snap button, white rods, transparent rod, black rubber ring, rubber ring
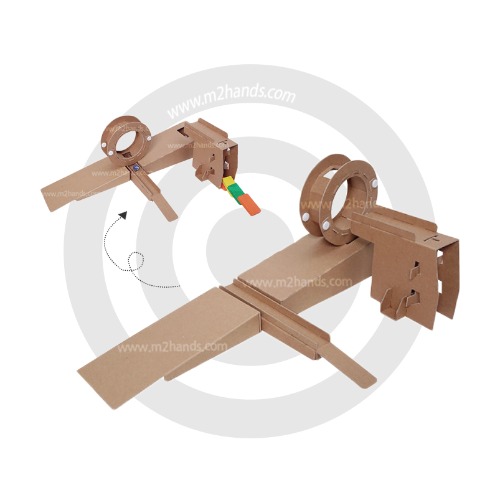
The elasticity of the rubber band connected to the rear wheel shaft causes the vehicle to move.
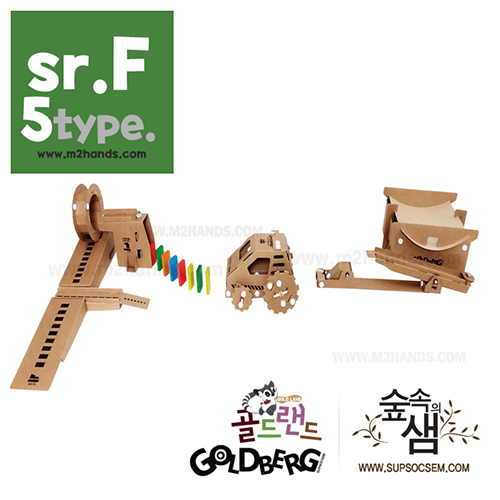
Goldberg's connector. The rubber car moves to knock down the domino and activate other devices.
It can be used between the F-2 choochoo rail and the F-4 hoop rails, and can also be used in other devices.
1 Step. Make a rubber car body
① Fold the body along the fold line as shown.
② Insert the hook into the groove of the body.
③ Secure with snap button in line with groove. (Four)
2 Step. Assemble the rubber car bottom plate
① Fold the bottom plate along the fold line.
② Fit the bottom plate to the body. (Note the forward and backward directions)
③ Secure with snap button to fit groove in body and bottom plate.
3 Step. Assemble the front wheels
① Fold the front wheel fixing plate as shown.
② Insert the fixing plate to the groove of the front wheel and fix it with the snap button.(Two wheels)
③ Insert a white rod (long) into the groove in the front of the body and fix both sides with a rubber ring.
④ Insert the front wheel into the white rod and fix it with the red rubber ring.
4 Step. Assemble the rear wheel
① Fold the rear wheel fixing plate as shown.
② Insert the fixing plate into the groove of the rear wheel and fix it with snap buttons. (Two wheels)
5 Step. Assemble the rear wheel axle
① Fold the rear wheel axle as shown.
② Align the grooves of the rear wheel axle with each other, and fix it with snap buttons.
6 Step. Connect the body and rear wheels
① Insert the rear wheels into where there are four protruding grooves on the rear wheel axle.
② Fold the protrusion groove with folded line and fix it with snap button. (two)
③ Insert the rear wheel axle into the back of the body.
④ Assemble the other wheel in the same way.
7 Step. Assemble the transparent rod holder
① Place the transparent rod holder on the groove on the top of the body and secure it with the snap button.
8 Step. Complete the rubber car
① Put the rubber band in the middle of the rear wheel as shown.
② Secure the white stick (short) to the hook by hanging the rubber band as shown in the picture.
③ Take out the rubber band with the opposite rear wheel and insert 4 paper washers.
④ Put the transparent rod into the rubber band.
⑤ Put the black rubber ring on the transparent rod.
9 Step. Try a rubber car
① Hold the rear wheel without the transparent rod by hand and turn the transparent rod about 10 turns counterclockwise.
② Hold the wheel so that it does not loosen and move the transparent bar holder to hang the transparent bar.
③ Put a rubber car on the floor.
10 Step. Let's connect with the Goldberg device
① F-2 Hang the rubber ring of the transparent rod on the front of the choochoo rail.
There are no posts to show
There are no posts to show
PLEASE SELECT THE DESTINATION COUNTRY AND LANGUAGE :